Static Mix Technique: How to Start Your Mix With Confidence

When you start mixing a new track, you can easily get carried away experimenting with plugins and automation.
But adding too much too soon can result in a cluttered session that causes you to lose your perspective.
To avoid it, many engineers swear by a technique called a static mix.
If you haven’t heard the term before it might seem confusing. But it’s a helpful way to start a mix—especially if you’re feeling lost.
In this article I’ll break down the basics of the static mix technique and explain how it can help you get better results.
What is the static mix technique?
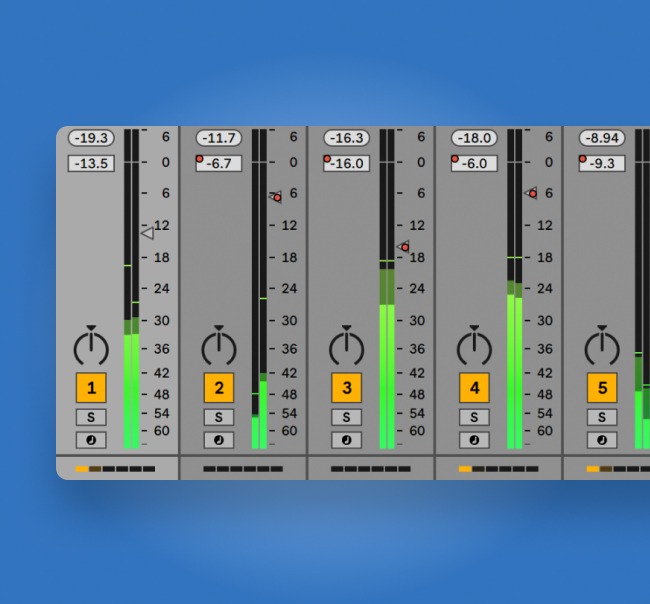
A static mix is a rough draft mix made with only the basic DAW mixer tools like the channel faders, aux sends and panning.
It’s done to balance the levels of all the tracks in a session and put them in a general position before changing any of the sounds with compression, EQ or reverb.
A static mix helps you hear how each element interacts and make a plan for how to proceed with your process.
Why start with a static mix?
During recording, it’s easy to follow your creative intuition and lay down a lot of material.
When you start mixing your music, you’ll have to shift gears. Elements that seemed fun and interesting when you recorded them could be creating clutter or contributing to muddy sound.
A static mix is a rough draft mix made with only the basic DAW mixer tools like the channel faders, aux sends and pan pots.
While you should always start with your mix in mind, it takes some experience to develop these instincts.
If you’re in this situation, you’ll have decisions to make at the start of your mix—especially if you’re mixing a session you didn’t record yourself.
Creating a static mix will help you find the focal points of your track and build your session to support them.
Not only that, it will make your compression and EQ decisions easier. You may not have to make changes to the dynamics and frequency balance of each track.
Finally, it will help you understand when to use mix automation. If it’s clear from setting the fader level and pan position that your sounds will require more than gentle sculpting to fit, automation can come to the rescue.
How to build a static mix
Building a static mix is fairly straightforward, but it requires you to approach your session in a different way.
Instead of reaching for plugins to correct problems, you’ll have to listen to your mix as a whole and react to your sounds as they are.
Here’s my three step guide to building a basic static mix:
1. Choose your loudest elements
A great place to start is to zoom in on the loudest elements of your song.
Creating a static mix will help you find the focal points of your track and build your session to support them.
In most modern mixes these will be kick, snare and vocal tracks.
Start your static mix by setting each of these faders to unity and listen to how they interact.
If you’ve paid attention to gain staging throughout your process you should have ample headroom. In that case you can leave all three at 0 dBFS if needed.
But depending on how they fit together, you may have to turn one or the other down slightly.
Once you’ve done this you’ve established the loudest element of your mix!
2. Build your stereo field
As you add the rest of your mix in, start experimenting with stereo positions.
There’s no rules, but in general the lead vocal track, kick, snare and bass should occupy the center of the mix.
Any tracks recorded in stereo should be left that way, but feel free to experiment with the balance between left and right if needed.
The remaining mono tracks should be panned across the mix to taste. Just make sure not to neglect the extreme left and right of the spectrum.
A wide sounding mix always contains some material at the far edges as well as throughout the stereo space.
In fact, you may find the LCR technique is worth a try while building a static mix. This is another technique that helps simplify your mixing decisions. Check out this guide to learn more.
A wide sounding mix always contains some material at the far edges as well as throughout the stereo space.
3. Balance the levels
With most of the elements in place, you’ll get a sense for how each track needs to be adjusted.
Here’s where you need to use your ears and balance each element so it speaks clearly in the mix.
There’s no right or wrong here, but you may need to make several passes to get the balance as close as possible.
If something is taking up too much space, decrease its level fader or pan it away from conflicts with main elements.
You may not be able to make everything sound clear, but you’ll at least have an idea of the issues you’ll face when you start adding plugins.
4. Start using your plugins
Speaking of which, with your static mix completed, the next step is to start adding plugins.
If you’ve managed to get close using just your DAW mixer, you’ll find the rest of your process much easier.
Now it should be simple enough to identify which sounds need EQ and how you should control your song’s dynamics with compression.
5. Make the remaining adjustments with automation
If you’re still having trouble keeping each element in place after compression and EQ, automation should be your next step. Here you can manually control the level of each track at specific points on the timeline.
A good way to approach automation is by writing it in by hand using a control surface or your mouse. Head over to our guide to mix automation to get an idea of how it works.
The basic idea is to listen through the track with your hand or mouse on the fader and adjust by ear—the results might surprise you!
Static electricity
The static mix approach might seem like a basic technique, but it’s really time-saving workflow improvement.
Now that you have a basic idea of how it works, get back to your session and keep mixing.
Gear guides, tips, tutorials, inspiration and more—delivered weekly.
Keep up with the LANDR Blog.
Latest posts


